Delving into the world of concrete installation can be daunting, especially if you’re a novice. Fear not! This comprehensive guide is designed to demystify the process, breaking it down into manageable, step-by-step instructions.
Whether you’re a seasoned concrete contractor seeking to polish your skills or a DIY enthusiast embarking on a new project, this guide holds the key to mastering concrete installation. We’ll take you on a journey from understanding the essential components of concrete to the intricacies of its installation.
Rest assured, you’re in the right place to unravel the complexities of concrete installation. As we delve deeper into the process, you’ll discover tips, tricks, and best practices to transform your approach to concrete installation. Stay tuned as we unveil the secrets of seamless concrete installation, one step at a time.
What is the concrete installation process?
The concrete installation process involves several critical steps that ensure the longevity and durability of the finished product. The first step is site preparation, which entails clearing the area of any debris, vegetation, or other obstructions that could interfere with the concrete installation.
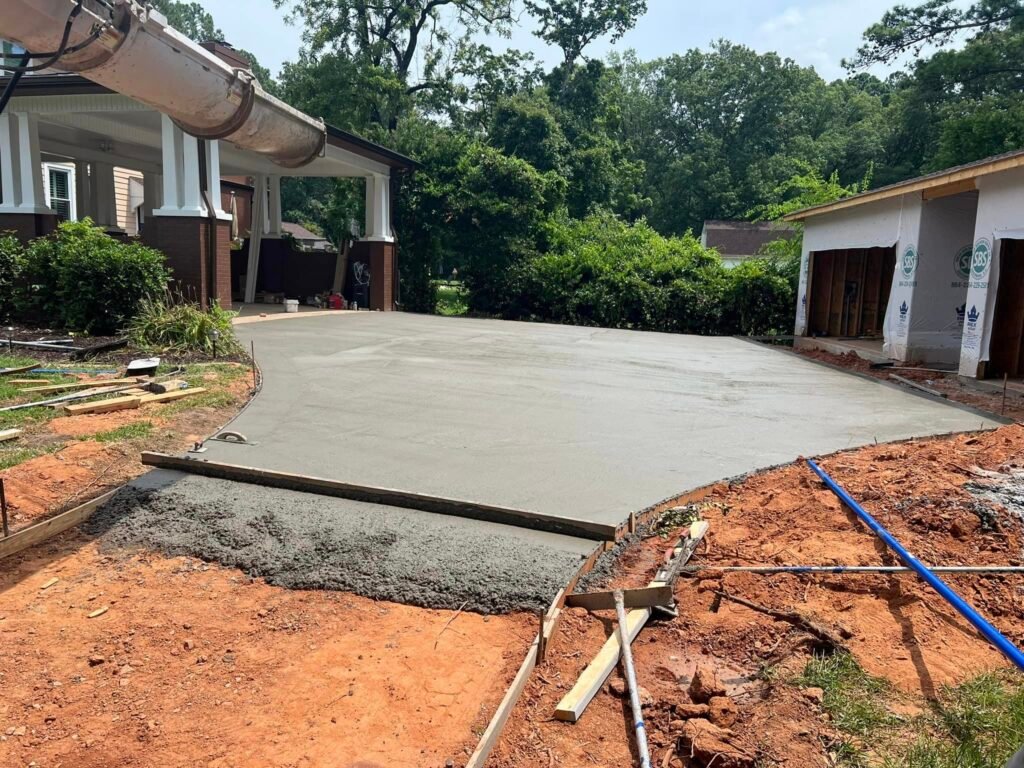
Next, the area must be properly graded to ensure water drainage away from the concrete slab. Once the site is prepared, formwork must be installed. This involves creating a temporary structure to contain the concrete until it hardens.
The third step is the placement of reinforcement. This could be steel mesh or rebar, and it helps strengthen the concrete, preventing cracks and other structural issues.
It’s time to mix the concrete once the site is ready and the reinforcement is in place. The mixture should be consistent and lump-free, and it’s generally recommended that a concrete mixer be used for this process.
The final step is pouring and finishing the concrete. This involves spreading the concrete evenly within the formwork and smoothing the surface with a trowel.
The concrete installation process requires precision and patience, but with careful planning and execution, the results can be functional and aesthetically pleasing.
The duration of a concrete installation process largely depends on the size and complexity of the project. The process can take anywhere from a few days to a couple of weeks for a typical residential project, such as a patio or driveway.
The first step in the concrete installation process is the site preparation. This involves clearing the area, setting up forms, and installing rebar or mesh for reinforcement. The preparation stage can take a day or more, depending on the size of the area and the amount of prep work required.
Next, the concrete is mixed and poured into the forms. For smaller projects, this step can be completed in one day, but larger projects may require more time. Once the concrete is poured, it needs to be spread and leveled, known as screeding.
The concrete then must cure, a critical part of the installation process. Curing allows the concrete to achieve its full strength and durability. This process can take anywhere from 24 hours to 28 days, depending on the specific type of concrete used and the environmental conditions.
Lastly, the forms are removed, and the area is cleaned up. This final step doesn’t take long – typically a few hours to a day.
Remember, while these time frames provide a general guideline, the exact duration of your concrete installation process can vary based on factors such as weather conditions, the design’s complexity, and the work crew’s efficiency.
What materials are needed for concrete installation?
The first step in embarking on a concrete installation project is to gather the necessary materials. The primary material needed is a concrete mix, which consists of cement, sand, and gravel. The type of mix required will depend on the specific project, as different mixes are designed for various applications.
You will also need water to mix with the concrete. The amount of water needed will depend on the project’s consistency. Following the manufacturer’s instructions on the concrete mix bag is essential to ensure the correct water-to-concrete ratio.
Another essential material for concrete installation is formwork. This structure holds the concrete in place while it sets. Formwork can be made from various materials, including wood, metal, or plastic.
You will also need rebar or mesh for reinforcement, especially for larger concrete installations. This helps to strengthen the concrete and prevent cracking.
Tools such as a concrete mixer, trowels, and a leveling tool will also be necessary for the installation process. These tools will assist in mixing the concrete, spreading it evenly, and ensuring a smooth, level surface.
Finally, safety equipment such as gloves, safety glasses, and a dust mask are essential to protect yourself during the concrete installation.
Remember, each concrete installation project is unique, and the specific materials needed may vary based on the project’s size, location, and other factors.
Conclusion
In summary, understanding the concrete installation process, knowing the time it takes, and being aware of the necessary materials are critical in effectively managing any concrete installation project. These key factors ensure a successful project completion and contribute to the installed concrete’s durability and longevity.
Staying informed about future developments and trends in concrete installation will enable you to adapt to new techniques and technologies, enhancing efficiency and quality. It’s essential to continually learn and apply this knowledge to your projects for the best results. Remember, a well-executed concrete installation is an investment in the future.